Introduction to Technology for Musicians
2025_Spring
2025_Spring
  • Introduction to Technology for Musicians
  • Badge Requirements
  • Final Exam
  • Appendix
    • HTML, CSS, and JavaScript
    • Copyright & Licensing
    • Software Suggestions
    • Hardware Suggestions
    • Audio Recording
    • Audio Mixing (exercise)
    • Sound Reinforcement
    • Dorico Reference
    • Audio Synthesis & MIDI
    • Still Photography - Portraits
    • Stop Motion
    • Single Camera Video - Recording
    • Single Camera Video - Editing
    • Multicamera Video - Recording
    • Multicamera Video - Editing
    • DaVinci Resolve - Saving
    • DaVinci Resolve to Logic Pro
    • Electroacoustic Music
    • Music Video Student Project Examples
  • For instructor only
    • Planning for next semester
    • Student Websites
Powered by GitBook
On this page

Was this helpful?

  1. Appendix

Single Camera Video - Editing

PreviousSingle Camera Video - RecordingNextMulticamera Video - Recording

Was this helpful?

  1. open (free software from Blackmagic Design)

  2. create a new project

  3. click on the "Edit" tab at the bottom if the screen

Auto Sync Audio ()

  1. drag your video file and your audio file into the media pool

    • if asked, change the project to match the frame rate of the media

  2. select both files (video and audio)

  3. right click on the files and choose "Auto Sync Audio > Based on Waveform"

  4. drag the video file (only) onto the timeline (which should include the new [superior] audio file)

NOTE: if syncing with Audio does not work:

  1. go to the Media tab and do the following for each file:

    1. click on the file

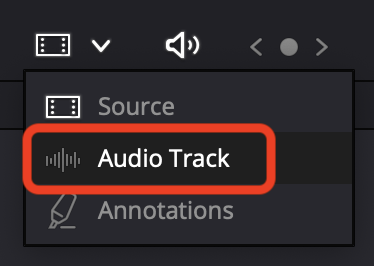
    2. view the waveform by choosing "Audio Track" from the dropdown in the bottom left of the playback window

    3. put the plaback head on one of the claps and add a "Mark In" by pressing "i (needs to be the same clap in each clip)

  2. go to the Edit tab

  3. drag each file onto the beginning of timeline separately

  4. mute the audio from the video file

Conduct further editing

  1. use Blade Edit Tool (press "b") to split track where you want the video to begin and end

    • slice the track where you want the video to begin

    • use the Selection Tool (press "a") to select the part you want to delete (from beginning to where you just sliced)

    • hold down Shift and press delete

    • use Blade Edit Tool to cut off the end of the video as well, select it and delete it

  2. fade in from black and fade out to black

    • choose the Effect Library tab at the top

    • under Toolbox, choose Video Transitions

    • drag the "Dip to Color Dissolve" to the beginning and end of your video

    • select the transition that you just added (on the video track) and change color from white to black on the settings in the right sidebar (you may have to select the "inspector" tab)

Get Audio Loudness Set (-14LUFS and -1TP)

    • File > Project Settings > Fairlight > Audio Metering > Target Loudness Level = -14 LUFS

    • set "Loudness Meter" to show -14 at top by clicking on three dots (...) and choosing = absolute level

    • True Peak can be seen on the Control Room meter (you cannot set it to anything, you just need to keep it below -1.0TP)

Render the video

  1. Choose the "Deliver" tab at the bottom

  2. Choose the settings for Youtube

  3. add to queue

  4. render

  5. upload to Youtube

watch this video =

https://www.youtube.com/watch?v=SyWFLS4VWvA
DaVinci Resolve - Saving
DaVinci Resolve
here's a tutorial